Friday, July 17, 2015

Candy Day Blog Hop!

Welcome to the Candy Day Blog Hop! 


This Candy Blog Hop will run for 2 days. If you came from Sarah Blog you are in right spot. 
But you want to start the fun at Haidee's Blog 
We are excited to have you hop with us! Each blogger participating in this hop is featuring a crafty project having to do with "candy". Who doesn't LOVE "candy"? Then we add crafty to it!!! Eckkkkk! 
You will find unique ideas that have to do with candy. We hope you'll enjoy each and every project along the way. And give you some crafty ideas.

Be sure to leave a comment at each hop to show some Bloggie Love and to qualify to win a PRIZE. It would be sweet if you 'follow' too.

$10 gift card. You will able to choose 1 from the 3 stores!!! One winner will win their chose.


Now unto my project... 
I made a faux Gumball machine.


when you run out of candy a gentle reminder that you need "More kisses" :)
I just used some mini sticker letters that I had in my stash.


I made this out of a clay flower pot and saucer, fish bowl some flat back pearls and pearl trim.


 Painted it. Glued a doily to cover the hole in the bottom of the pot.

 Glued the felt flowers and the vintage flowers at the top and at the bottom

I'm giving this to my girlfriend so she can set it on her desk at work. Her Birthday is next month :)


Your Next SWEET stop is Miranda

Here is a list of the line up. Just in case if you get lost:

 Liz

Come back to Haidee's Blog Monday July 21 to see IF you are the WINNER.

***********************************************************
HAVE A SUPER SWEET FANTASTIC BLOG HOP!!!

Friday, February 27, 2015

Favorite Recipe Blog Hop


Welcome to our Favorite Recipe Blog Hop.  If you are just arriving to our hop you are in the right place for your first stop and don't forget to visit everyone...you won't want to miss any of the amazing  Recipes that we have to share with you! 

In addition to seeing some awesome recipes and/or projects, there is a chance to win some blog candy! To be eligible to win the blog candy, you must leave a comment on each stop in the hop as well as hitting that little "follow" button! Winner will be chosen on Sunday, March 7th so you have all week to hop through !


For this hop I am giving away to one lucky winner is this great Project Life Recipe Pages Kit by Becky Higgins. I have one of these myself and I am using it to pulled together all of our families favorite recipes along with pictures, and tips and suggestions to give to my Daughter when she gets married.


So, grab yourself a Latte', sit back and hop along with us as we share our projects with you.


I got this recipe from a co worker whenever I make this Salsa everyone 
goes crazy! Its so good you can almost eat it with a spoon, lol and it's so easy to make.
                                                   
                                                    1-2 bunches Green Onions -sliced thinly
                                                    6-8 Roma tomatoes - chopped
                                                    2 bunches Radishes - minced
                                                    1/8 to 1/4 of a bunch Cilantro -chopped finely
                                                    4-8 Serrano Chili's -8 depends on hot you want it, chopped
                                                    4-6 Avocados -chopped
                                                      1-2 lg cans Tomato sauce (I usually use one)
                                                    1 cup  Water 
                                                     Garlic salt to taste 
                                                     Salt and pepper to taste 

Combine all ingredients in a bowl. It makes a big bowl of salsa. The bowl in the pictures is just about 1/4 of what this recipe makes. I little hint; I've actually chopped the cilantro, radishes, serrano chilies in my food processor. Serve with Chips.  If you make it let me know what you think. Enjoy!
Here is a link to another recipe I'm fond of here and here is the link to other recipes I've posted on my blog that are family favorites.


Your next stop will be with...

 Theresa Rawlins Knopf 


If you get lost along the way here is the entire 

line-up of today's hop for you to get back on track and not miss a single project.

1. Robin ~ http://create-a-latte.blogspot.com/

2. Janet ~ http://janetscreativeworld.blogspot.com/

3. Miranda ~ www.nanasscrapspot.com

4. Alicia ~ http://www.goldengoddessdesigns.blogspot.com/

5. Connie ~ http://www.conniecancrop.blogspot.com

6. Michelle Kinde ~ http://www.michellekinder.blogspot.com/

7. Jessica Douglass Wilson ~ http://stampinandcraftin.blogspot.com/

8. Audrey Dickinson ~ http://kreativekreationbyaudrey.blogspot.com/

9. Liz Mullen ~ http://scrapiliciouslife.blogspot.com/

10. Theresa Rawlins Knopf ~ http://scrapsbygracie.blogspot.com/

11. Michele Smith ~ http://michelescraftroom.blogspot.com/

12. Rhonda Helm ~ http://craftingwithblue.blogspot.com

13. Sarah Biswabic ~ www.sarahbiswabic.blogspot.com


Sunday, January 04, 2015

It's 2015!

Wow! I can't believe that it's January 4th! December flew by. So much has happened Since the last time I was here. I'll share a few events that happened...

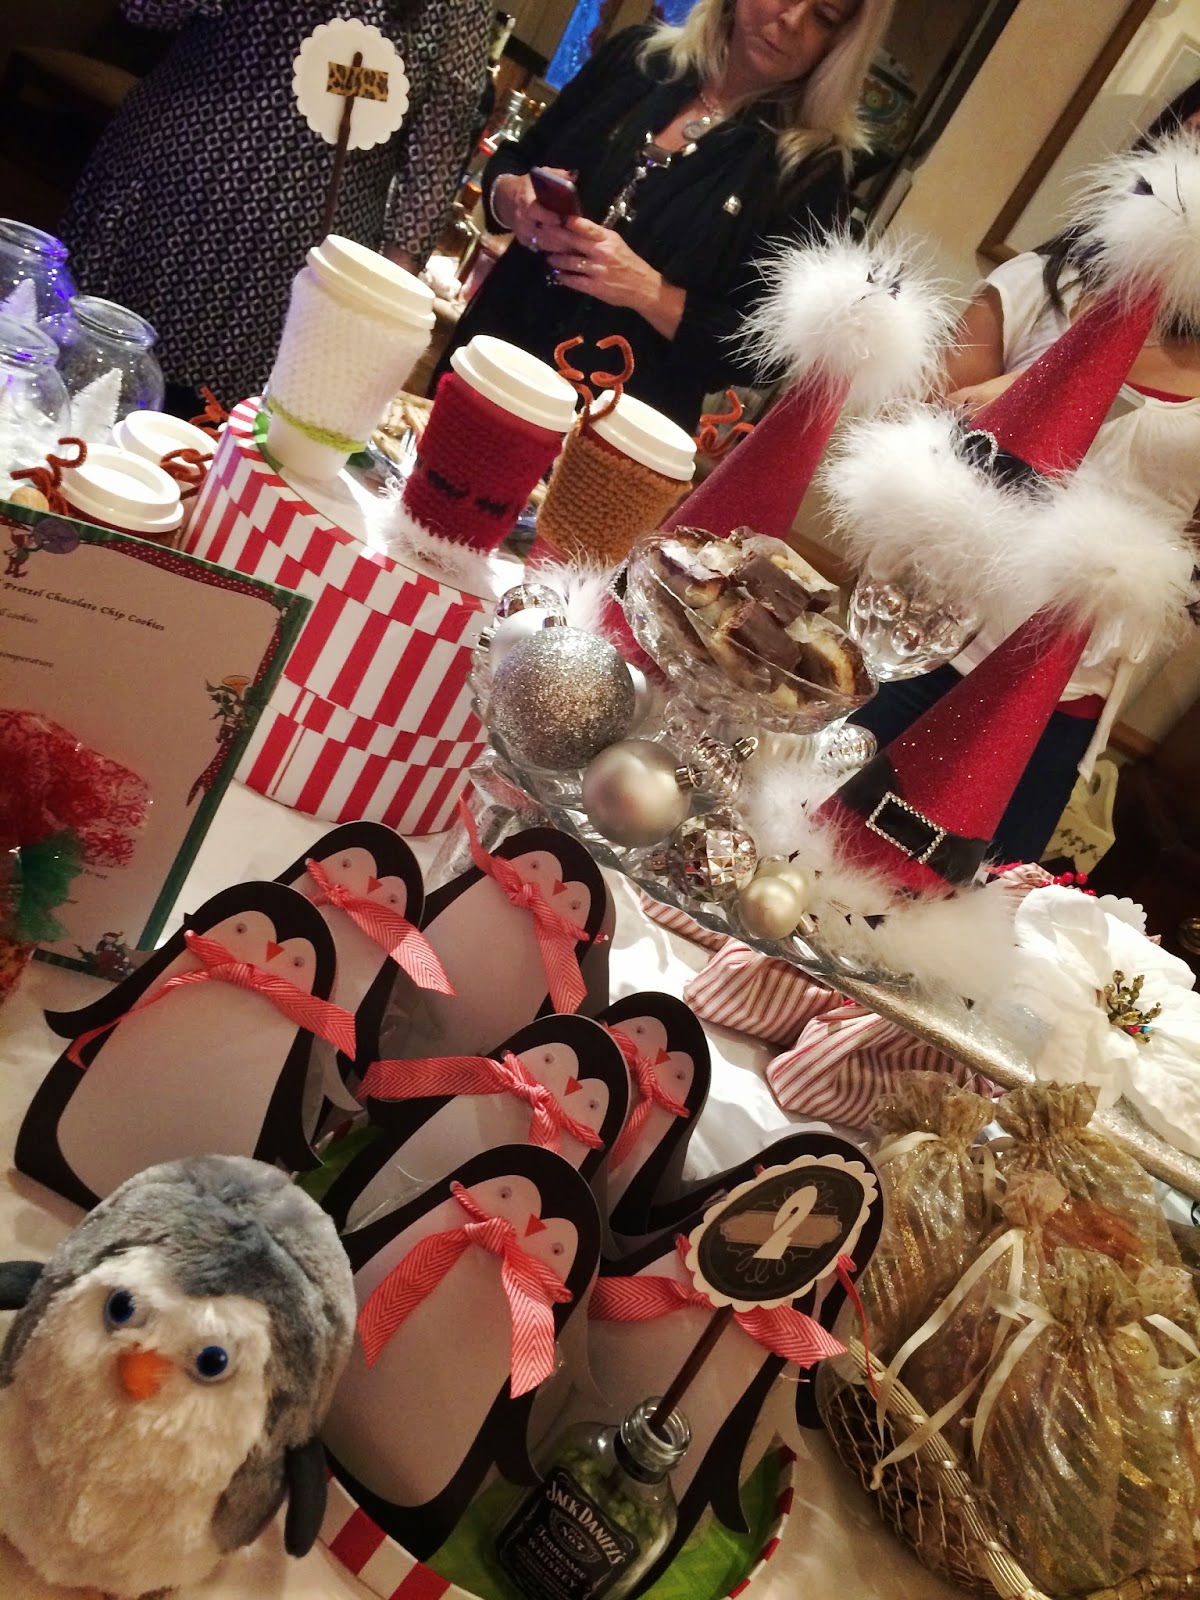
  •  Our annual christmas cookie party. My Mom. sister and I have hosted this party for a few years now. There were 10 Bakers this year. We have Prizes for Best Cookie, Best packaging and Best Table Presentation. 


The Best Cookies
The striped cookie was the Winner
it was a cherry layered shortbread


Best Packaging was a tie.
The first one is this.
Look how cute the snow globes are. She used a gold fish bowl on top of a paper round box... how clever!


The Second one that tied was me! I made the bags from scratch. 
I also made the JOY sign. Below I'll have a tutorial for you.


Best Table Presentation 
This entry was by a First timer! 
I think our friends are a bit competitive!, LOL


Here are a few of the other entries.


Here is how I made the JOY sign. 
I used my explore to cut the chipboard. 
Let me tell you that the explore cut the chipboard like BUTTER!
I cut the moss to fir the letters


 I added the moss to the chipboard with hot glue gun


I love the way it came out. I added light to the letters last minute. 
I remembered that I had bought a 20 light string at the dollar store.
this is what it looked like


  • I made all kinds of cards and tags for my gifts


  • I unexpectedly got a new job! A friend out of the blew asked me if I would be interested in watching her children. I excepted the Nanny job. Three days a week. It's been such a joy. I'm loving it. It has thrown my world in a spin with the holidays, having my girls home and everything else. so needless to say I've just been a little crazy plus we leave to Hawaii on Saturday for a week!
I'm planning on sharing some of the crafty things I did last month. I hope you can stop by soon.
Thank you for taking a peek,
Liz


Sunday, November 30, 2014

An After Thanksgiving Recipe

Hello There, I hope you had a fabulous Thanksgiving. Enjoyed your family and friends. I sure did even though our oldest daughter couldn't join us this year (her first year away) and of course we missed my dad but I know he was with us. There is a lot to be grateful for. 
It's been a while since I shared a recipe with you all. With all the turkey left over I thought I would make Turkey pot pies. They came out really good so I thought I would share the recipe in case you has left over turkey too and wanted to they something new.


I had never made this before so I turned to my old trusted cookbook 
This book had every recipe you ever wanted to make. I love the waffle recipe and this booked
helped me cook my first Turkey (some 30 years ago) and I can say that I have alway had my turkeys come out moist.
Chicken or Turkey Pot Pie
6 servings (I only got 3 out of this recipe)
1/4 cup butter or margarine
6 tablespoons flour
1 cup milk
2 cup chicken broth
3 cups bit-size cooked chicken or turkey meat
1/4 teaspoon rosemary
1/4 teaspoon savory
1 tablespoon minced parsley
1 teaspoon salt
1/4 teaspoon peper
2 cups cooked carrots; thinly sliced
2 cups cooked peas
1 box(2 inside box) Pie Crust (i used Pillsbury Pastry Pie Shell Crust)
1 egg yolk mixed with a tablespoon of water.


preheat oven 450 degrees. Melt butter in large pan over moderate heat, blend in flour, add milk, and broth, and heat, stirring until thickened. add chicken and all seasoning, cover and simmer 5-10 minutes, stirring occasionally. Cool to room temperature. Mix in carrots and peas and spoon into 5" aluminum pot pie tins. I lined it with the pie crust. I used the plastic cover that come with the tins to make the circle and lined the inside of the tins. I used the extras pie crust to lay over the top and I pierce the top of the pie crust and brushed with the yolk mixture making sure not to cover the piercing. Place in oven for 30-40 mins.

note: I changed it a bit. I didn't have the rosemary or the savory so I added onion and garlic powder  and celery salt to taste. This recipe has you put the meat mixture in a casserole dish instead of the pot pie tins. My family really liked them. you can see I was being a bit artsy with one of the tops, lol I could help myself.

Thanks for taking a peek,
Creating and Sharing with Love
Liz
I invite you to follow here and over on 


Tuesday, November 25, 2014

Some Snowman Card

 Hello, I feel like I'm skipping Thanksgiving only two days away and I haven't made anything. Yikes and I do need to make a few things like the name place setting. Yikes, I need to do that today!
I made these cards for my college peeps in sending care packages next week. I used the new Anna Griffin's Christmas Kitsch Cricut cartridge. I do like this cartridge's vintage vibe. Hence this cute 4.5" snowman.

I used a 1/2 of kraft paper dolly from Michaels. I really fell in love with these. 
Im a sucker for dollies!


The enamel dots are from the DIY Christmas line by Simple Stories
the Holly & Berry pick is from Hobby Lobby.


I stitched around the whole card in black ink.
I attached the snowman with a Action Wobbles


 Take a look at it in action over on my Instagram 

Thanks for taking a Peek.
I have a new FB page. I invite you to like it.

Creating and Sharing,
Liz

Friday, November 21, 2014

JOY..


Hello, today I'm sharing a project that I'm loving to put together. 
These letter are 12" made of paper mache. I painted the back, sides and a 1/4 from the edge with antique white.


I used Teresa Collins Christmas line for 2013 Santa's List


Tim Holtz Rosette die and from Hobby Lobby the Holly and Berries.


I used some flair buttons that were given to me. Mini pinecones which I love, I cut the pennant from the a Sizzex die,  I mentions a few blog post ago.


I also used some Heidi Swapp stuff from the Believe line


I'm working on one project similar to this one that I'm making a kit to sell. My first attempt, cross your finger it goes well.
I would like to invite you to Like my Facebook Page, I thought it made sense to post all my projects there for easy access! Yikes I feel a bit stressed about it. I'm hoping it keeps me accountable. I guess this empty nester is filling up her time, LOL

Thanks for taking a peek,
Creating and Sharing with Love, Liz